The portal offers a user-friendly platform for both end users and managers to effectively handle expenses. Users need to log in using their email addresses. Once logged in, they will have access to the dashboard's homepage.
Create Expense Request
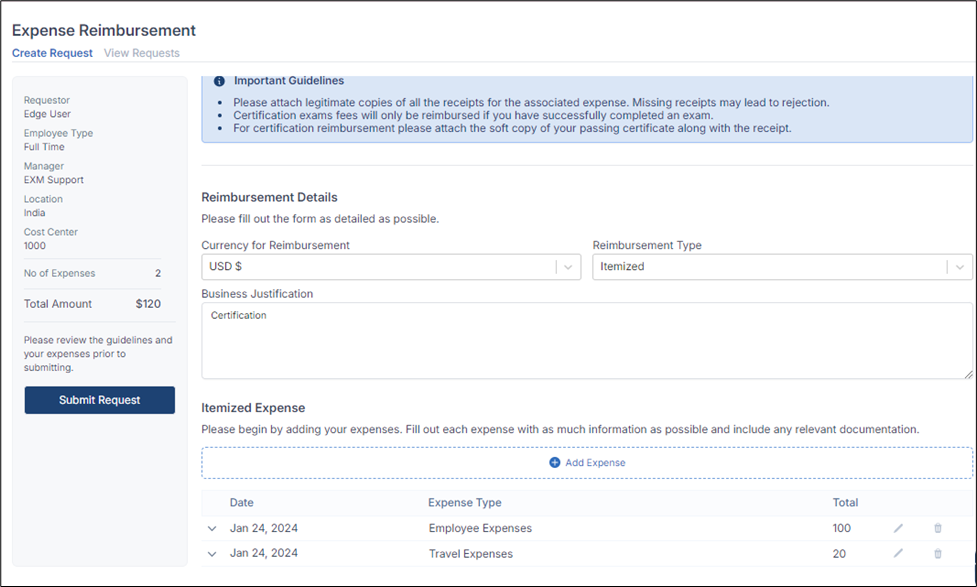
After signing in successfully, Navigate to Expense Reimbursement. You will be able to see the Create Request screen.
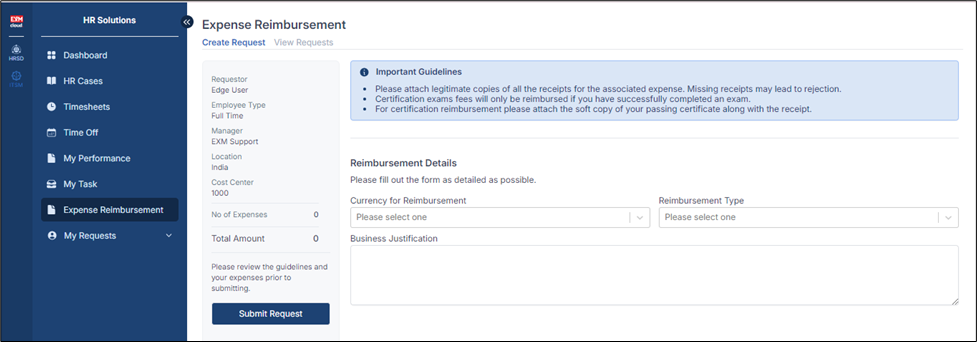
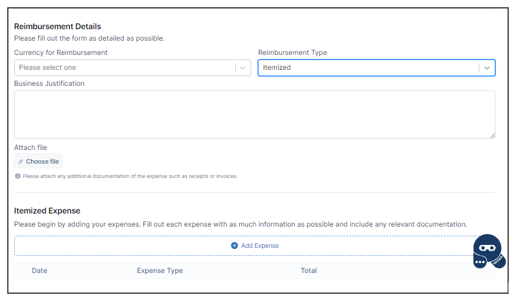
When creating an expense report, it is mandatory to select both the currency, reimbursement type and Business Justification. The selection of the reimbursement type should correspond to the expense items added, ensuring accurate processing and categorization of expenses
Enter Expense Details
| Fields | Description |
|---|---|
| Currency For Reimbursement | This field indicates the currency in which the expense is to be reimbursed |
| Reimbursement Type | Choose the appropriate expense type (e.g., Itemized, Bulk , Image Upload). |
| Business Justification | Provide a brief description of the expense, such as the purpose. |
a) When the Reimbursement Type is "Itemized" Then click on "Add Expense" button that allows users to add individual items or components to the expense.
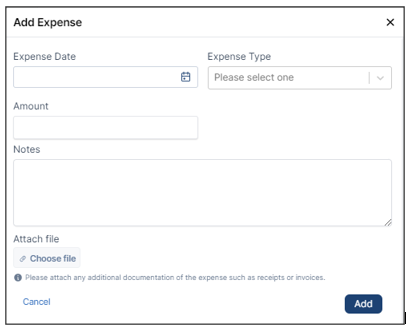
When a user click the "Add Expense" button, a pop-up form should appear to input itemized expense details.
| Fields | Description |
|---|---|
| Expense Date | Specify the date when the expense occurred |
| Expense Type | Choose the appropriate expense Type |
| Amount | Enter the cost of the expense |
| Notes | Provide a brief description of the expense, such as the purpose |
| Attach File | Upload relevant documents, such as receipts or invoices etc. |
Repeat these steps for each item that contributes to the total expense.
b) When the Reimbursement Type is "Image Upload" then that automatically reads data from uploaded files and adds them to an expense Item. Users upload the files scanned documents of their receipts or invoices in the portal. Automatically create an expense entry or line item for each set of extracted data.
Populate the expense details within each entry with the extracted data, including: Expense Date, Expense Type, Amount, Notes, Attach File.
Users can review and edit the populated expense details. Users have the option to make corrections if necessary. After reviewing the Expense Detail the User can submit the Report.

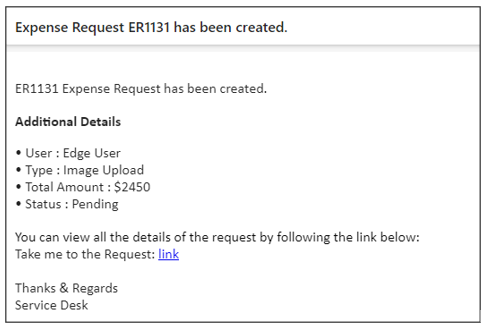
Click on Submit Request to submit the Expense Request and you will be redirected to the View Requests screen where user can see all the Expense Requests created by them.
Once submitted, the Manager of the user would receive an Approval Request for the Expense Request
Notifications
- An Email and Teams notification will be sent to the user with the details and link
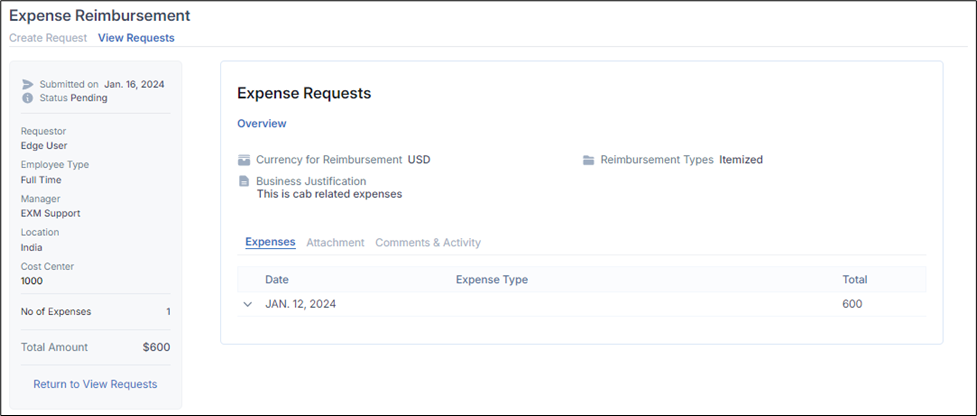
View Expense Request
Users can view their created Expense Requests and its details on the View Requests screen.
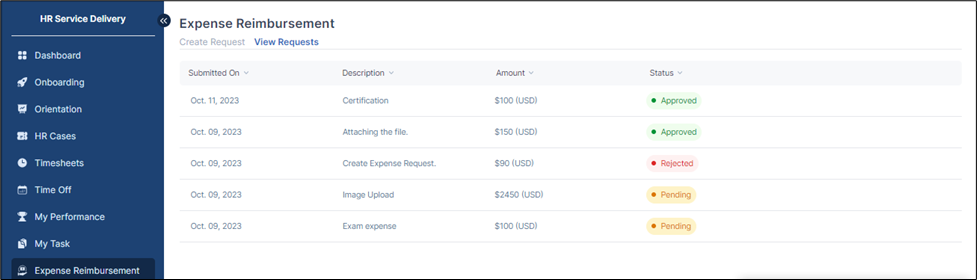
Click on a particular Expense Request to view its further details.