
Create Change
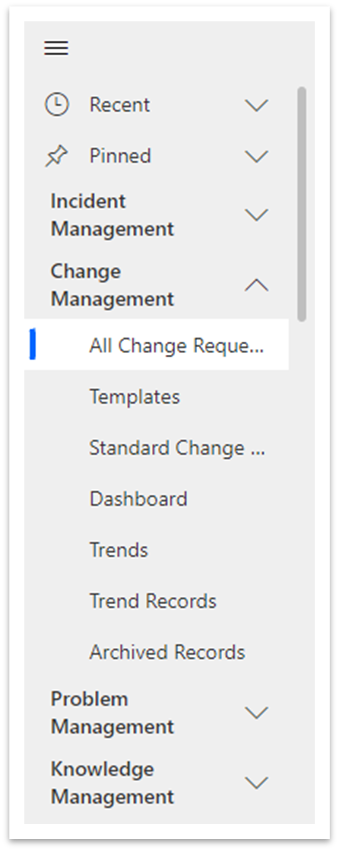
Navigate to Change Management > All Change Requests in the left navigator.
Click on the  button on the top ribbon of the view.

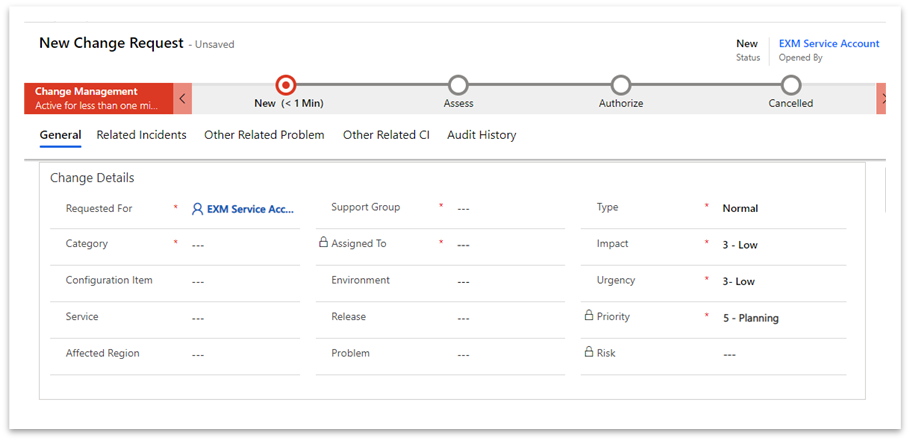
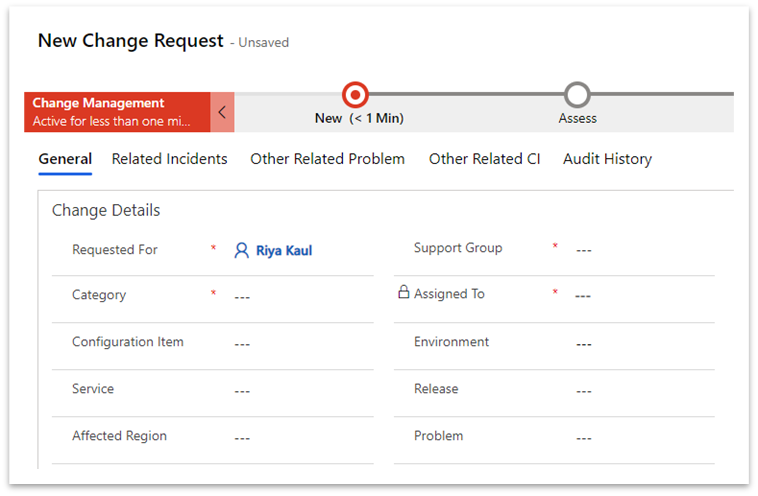
The new change form will open.
Required Fields: Requested For, Category, Type, Impact, Urgency, Priority, Short Description, Support Group, Assigned To, Outage Required, Outage Start Date (If Outage Required is true), Outage End Date (If Outage Required is true).
Pre-Filled Fields: Requested For, Opened By, Status, Type, Impact, Priority, Urgency.
Click on the  button on the top ribbon.
On successful submission, you will be redirected to the screen where your Change Number is generated automatically, Created On date is captured along with the details of the change provided.
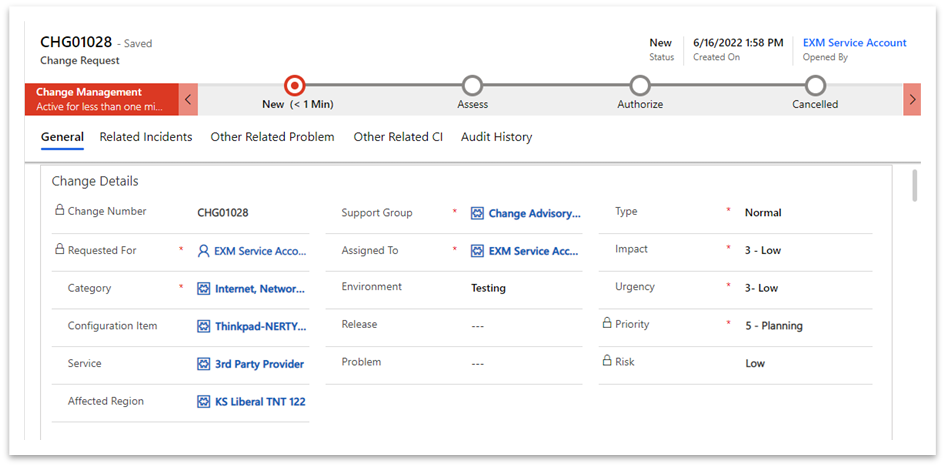
Change Form
General Tab
All the information related to the Change will be present in this tab. User can view/edit the fields and update the Change.
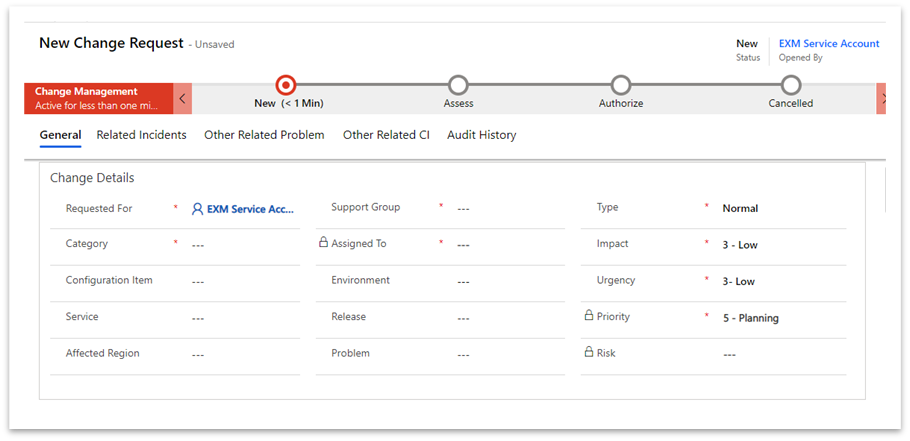
Header
Fields | Description |
|---|---|
Opened By | User who has created the change record. It is a prepopulated and non-editable field with current logged users. |
Status | Indicates the status of change. |
Created On | Indicates the date and time when the change record was created. |
Change Details Section
Fields | Description |
|---|---|
Requested For | User who contacted you with a change request |
Change Number | Unique auto-generated change number. |
Category | The category of the change, for example, Hardware, Network, Software. |
Configuration Item | Changes that are related to service offering |
Impact | Impact is a measure of the effect. |
Urgency | Urgency is a measure of how long the resolution can be delayed. |
Priority | Priority indicates how quickly the stakeholders/fulfiller should address the change. It is calculated based on Impact and Urgency. |
Support Group | Group who will work on the change |
Assigned To | User who works on the change. |
Status | States of Change. |
Risk | The risk level for the change. This field is calculated based on Risk Assessment |
Type | Type of change which is being created (Standard, Normal or Emergency) |
Problem | This field indicates which problem it is related to if applicable. |
Environment | Indicates whether the change is scheduled in testing, development, or production environment. |
Release | Indicates release activities related to the change. |
Additional Details Section
Fields | Description |
|---|---|
Short Description | Brief description of the change. |
Description | Detailed explanation of the change. |
Informed Names | It stores the users to whom notifications will be sent regarding change. |
Additional Approvers | It stores the name of additional approvers added for change. |
Service | Indicates the service tied with the change. |
External ID | Unique Record Identifier for external systems. |
External System | External System associated to the change. |
Planning & Schedule Section
Fields | Description |
|---|---|
Outage Required | Indicates the whether the services will be available or not at time interval when change is being implemented. |
Outage Start Date/ Outage End Date | Indicates the duration at which service will not be available |
Implementation Plan | Indicates steps required to implement the Change |
Risk and Impact Analysis | Indicates the potential risks associated with the Change. This field is required before the Change can be submitted for Approval. |
Justification | Indicates the reason for the required change. |
Test Plan | Indicates the details of the planned and completed tests prior to implementation that indicate potential success of the Change. |
Backout Plan | Indicates the steps to revert the Change to its state prior to implementation. Include information about when the Change can be backed out. |
Planned Start Date | This field should be filled in new stage which indicates when change implementation should start. |
Planned End Date | This field should be filled in new stage which indicates when change implementation will complete. |
Actual Start Date | This field gets auto populated in implement stage with current date and time when it implemented. |
Actual End Date | This field gets auto populated in review stage with current date and time when it ended. |
Fields | Description |
|---|---|
Close Code | Indicates whether the change is successful or unsuccessful. If the closed code is selected as unsuccessful it will send an email/teams notification to the CAB/eCAB members to review the change. |
Closed Notes | Captures the comments of fulfillers when change is closed. |
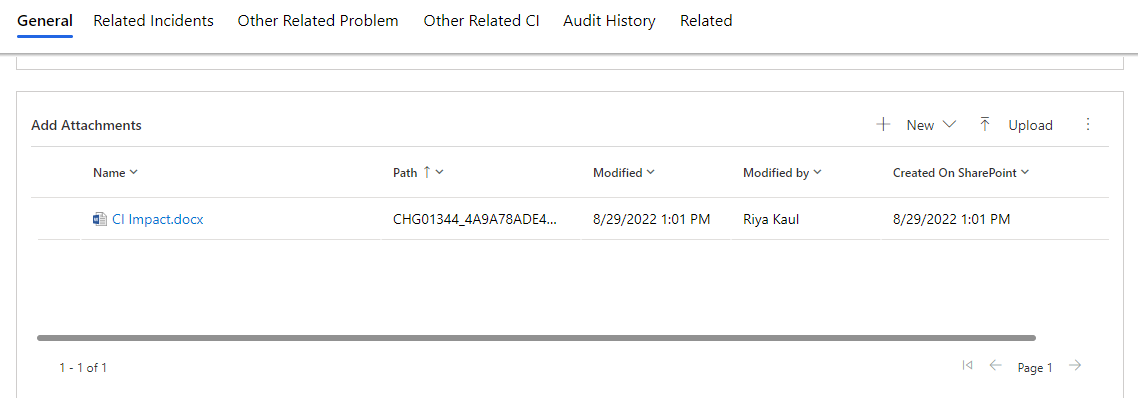
Add Attachments Section
Add/View the attachments related to the change.
Change Tasks Sections
A change task is a piece of work related to the change request. For example, there can be tasks to plan the change, implement the change, and test, and review the work. Change tasks can be created manually or are populated when change is created from template. The Change Request form has a Change Tasks related list, which includes all change tasks. From this related list, you can edit existing tasks or create tasks.
Create/View the change tasks related to the change.
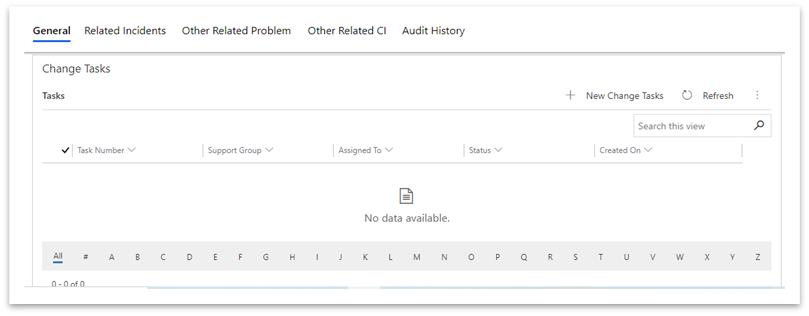
To create change task, click on  the button. You will be redirected to the change task form.
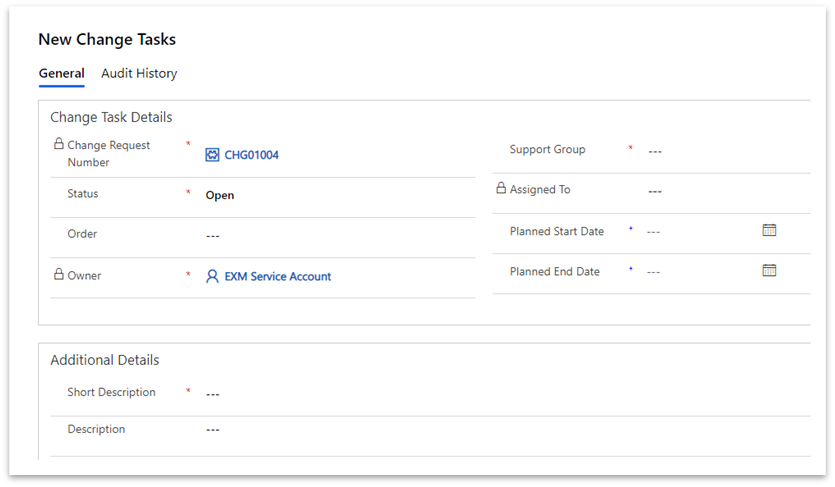
Required Fields: Change Request Number, Status, Short Description, Support Group.
Pre-Filled Fields: Change Request Number, Owner, Status.
Click on the button on the top ribbon.
On successful submission, you will be redirected to the screen where your Task Number is generated automatically, along with the details of the task provided.
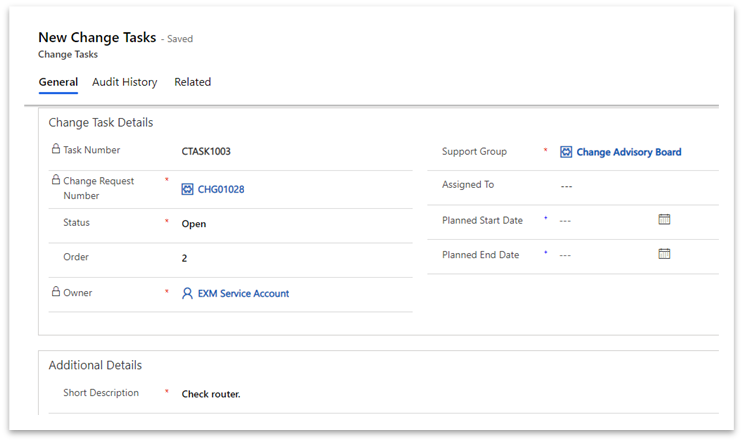
An email and/or team notification will be sent to the Assigned To user that the task has been assigned to them. If not specified, an email and/or team notification will be sent to the Support Group members that the task has been assigned to them.
General Tab
Fields | Description |
|---|---|
Change Task Number | Unique auto-generated change task number. |
Change Request Number | Change request number to which change task is related to. |
Support Group | Group who will work on the change. |
Order | Indicates the order of change task. |
Assigned To | User who works on the change. |
Status | Status of the Change Task whether it is open, in progress, pending, closed, or cancelled. |
Planned Start Date | Indicates when the change task can be started implementing. |
Planned End Date | Indicates when change task implementation will complete. |
Short Description | Brief description of the change task. |
Description | Detailed explanation on the change task. |
Close Code | Indicates whether is successful or unsuccessful. |
Closed Notes | Captures the comments of assigned to person or support group member when change task is closed or cancelled. |
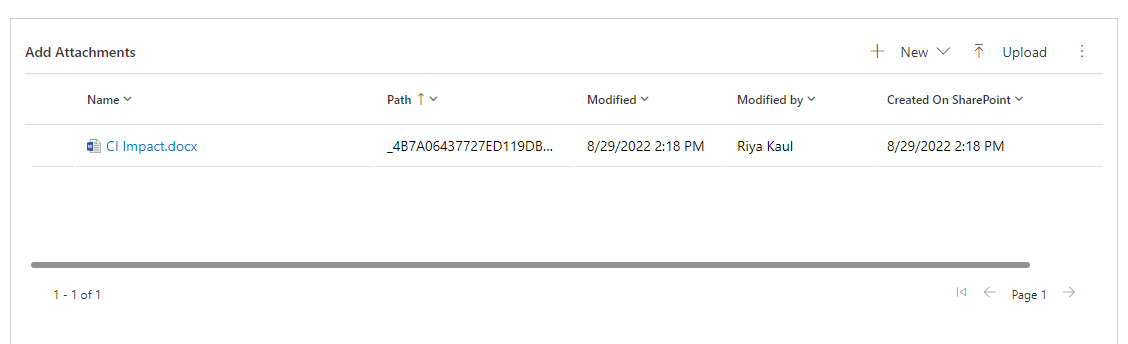
Add attachments section - Add/View the attachments related to the Change Task.
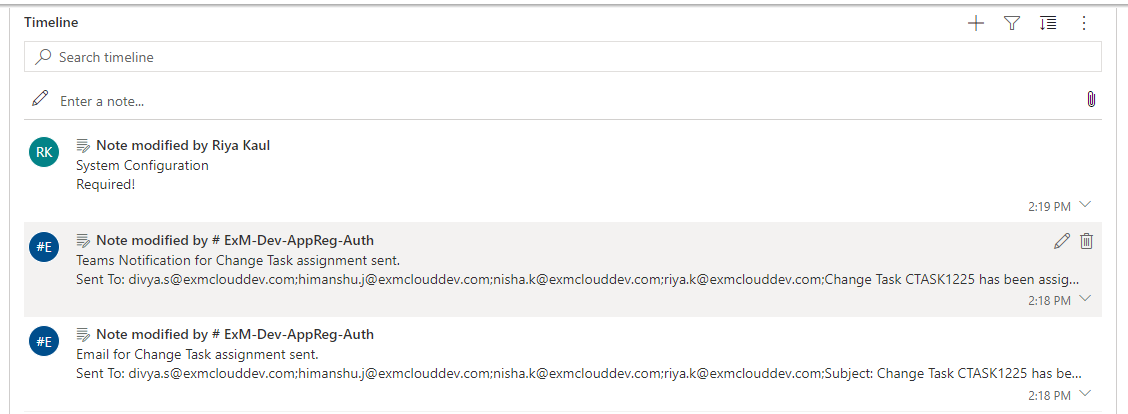
Notes section - Add comments to interact with the user and patch the sent notifications related to the Change Task. Also, one can add attachments to the notes.
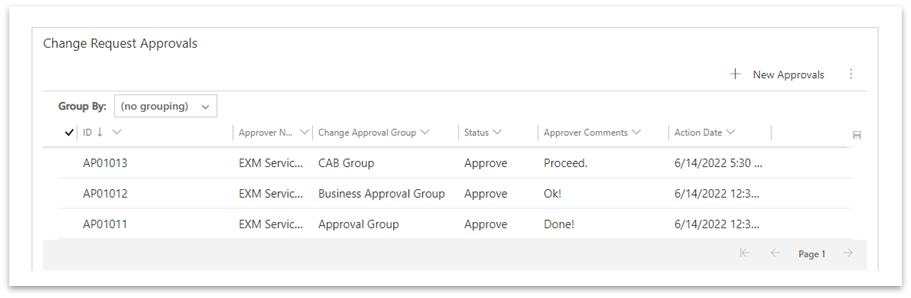
Change Request Approval Tasks Section
View details regarding the approvals for the change. The following details are captured:
Approver Names: The names of the users who received the approval requests.
Approver Emails: The emails of the users which received the approval requests.
Change Approval Group: Captures whether the user belongs to Approval Group/Business Approval Group/CAB/eCAB or is an additional approver.
Approvers’ Comments: Captures the approvers’ comments while responding to the request.
Action Date: Capture the date of the approvers’ response.
Status: Captures whether the approver rejected or approved the request.
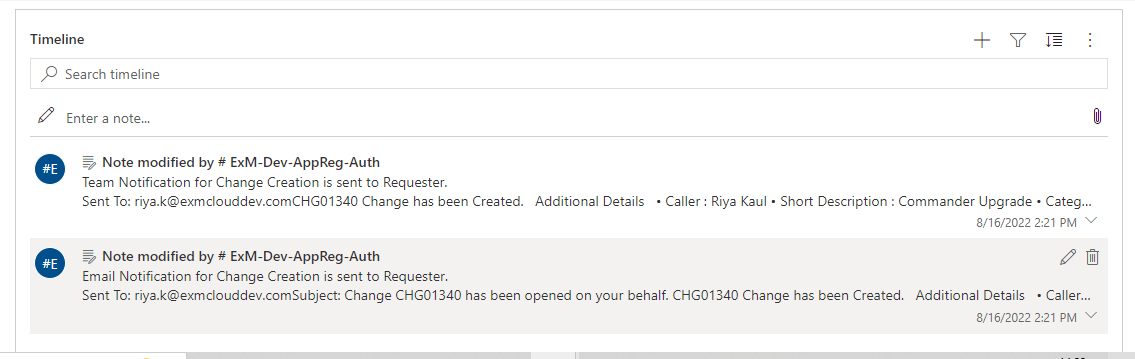
Timeline
Add comments to interact with the user and patch the sent notifications related to the Change. Also, one can add attachments to the notes.
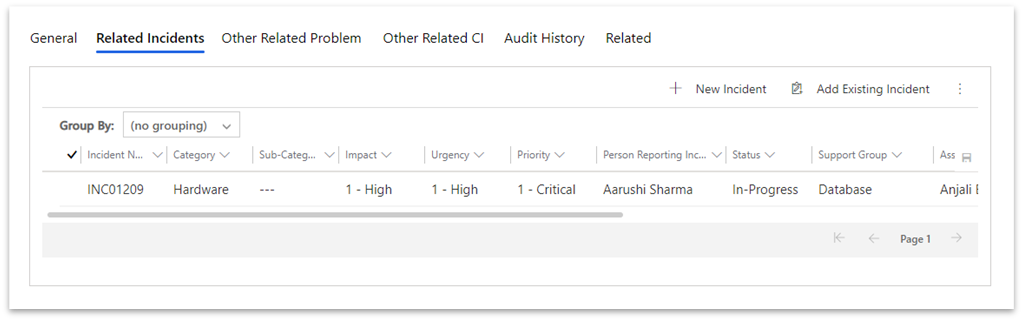
Related Incidents Tab
All the related incidents for the change can be found in this tab.
To add an already created incident record to the change, click on the  button and add the record.
To add a new Incident record, click on the  button. You will be redirected to the Incident Module.
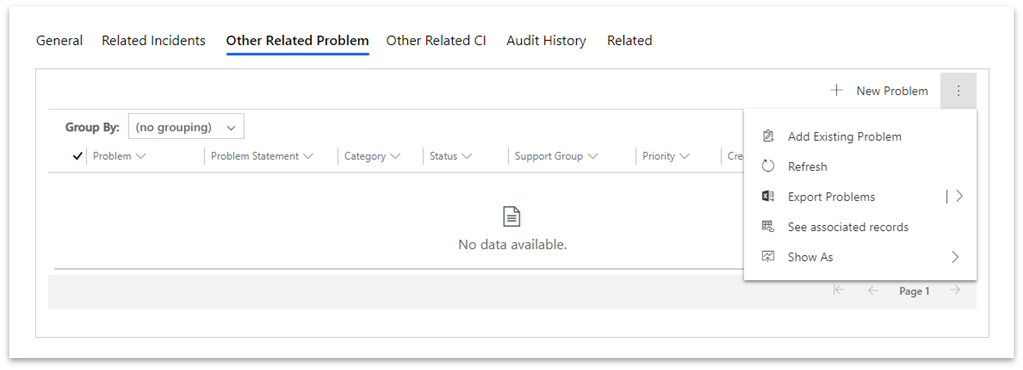
Other Related Problem Tab
The other related Problems for the change can be found in this tab.
To add an already created problem record to the change, click on the  button and add the record.
To add a new problem record, click on the  button. You will be redirected to the Problem Module.
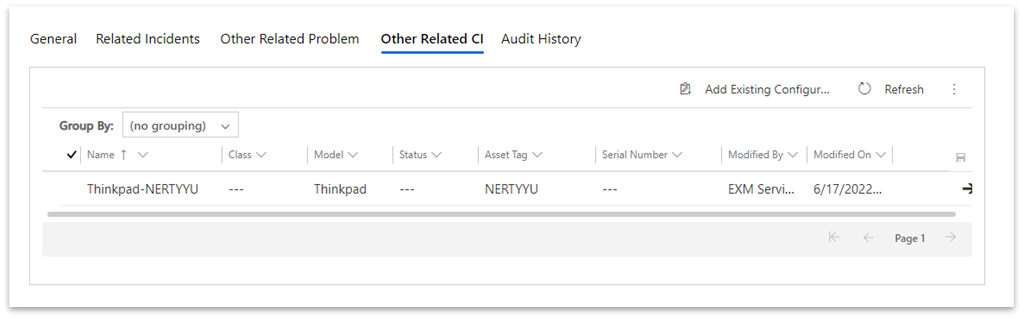
Other Related CI (Configuration Item)
The other related configuration Items for the change can be found in this tab.
To add a CI to the change, click on  the button and add the item.
Audit History Tab
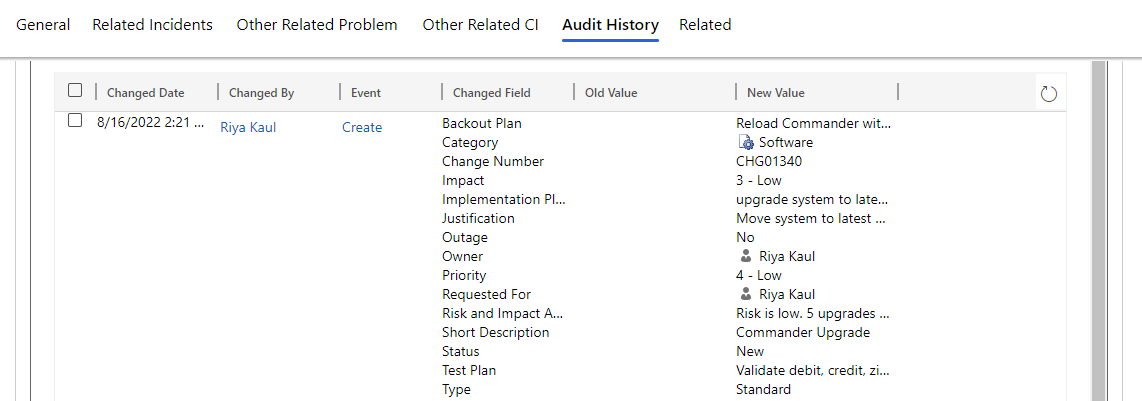
Any changes/updates made to the change will be captured in the audit history tab. The person who made the changes will be captured along with the time and the updated fields.
Audit History is where the system stores historical information for all records. These records are intended to be kept forever so that administrators can always track the history of audited records. As the number of auditing records grows over time, it becomes more inefficient to directly query the Audit table for historical information.
Copy Change
Copy change button is used to create a new change record by copying all required fields from change record details along with the change tasks if any.
Copy change functionality is applied to all types of change (Standard, Emergency, Normal)
Procedure
· Navigate to the change request to be copied.
· Click on the “Copy Change” Button in the top navigator.

· Then it will redirect to Change Record to the record created.
· After an existing change request is copied and a new change record is created.
Add to Informed
“Add to Informed” button is used to inform additional user about the change record. Informed users will receive email and/or teams notification when the change stage is updated.
Multiple users can be added using the “Add to Informed” button.
Procedure
· Navigate to the change request.
· Click on the “Add to Informed” button in the top navigator.

· Popup will appear.
· Select the users that needs to be added to Informed field.
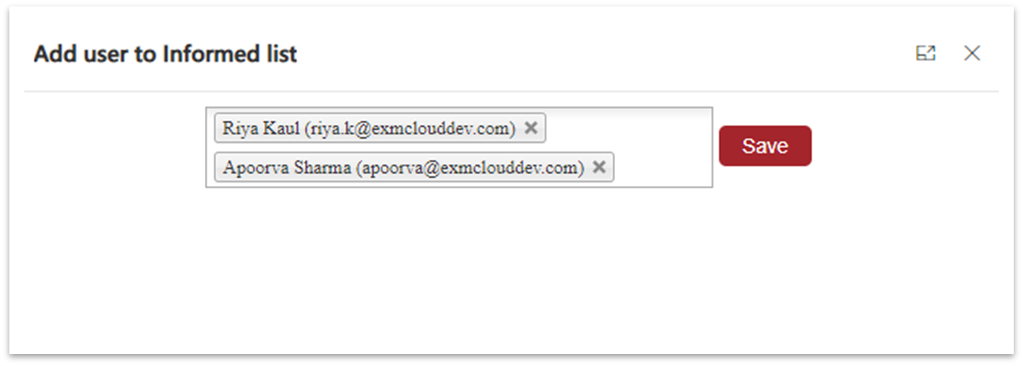
· Click on the Save Button.
After submitting navigate to the Additional Details Section. Under additional details section there is field name Informed Names which stores the additional user that needs to be informed.
Visibility: This custom button is only visible when the change status is New, Assess, Authorize, Schedule, Implement, Review.
Add Approver
“Add Approver” button is used to add additional approvers at New stage for the approval sent when the change moves from New to Assess stage for the CI based approval.
Multiple users can be added using the “Add Approver” button.
Procedure
· Navigate to the change request.
· Click on the “Add Approver” button in the top navigator.

· Popup will appear.
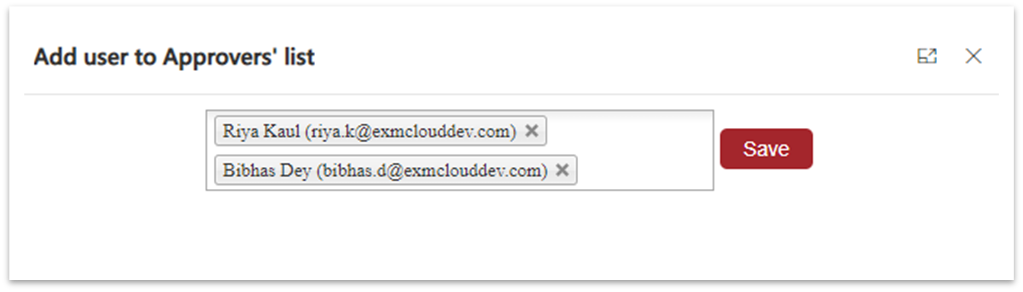
· Select the users that need to be added to Additional Approvers.
· Click on the Save Button.
After submitting navigate to the Additional Details Section. Under additional details section there is field name Additional Approvers which stores the additional approvers to whom approvals need to be sent at assess stage.
Visibility: This custom button is only visible on the new stage.
Archive Record
Archive Record button is visible in the change record view. Its functionality is used to remove all the closed change records between specified range of date from the Change Request Entity and store it into Change Archive Record entity. Users with ESM Super Admin role can archive the records.
Procedure
· Navigate to the change grid view.
· Click on the “Archive Record” button in top navigator.

· Popup will appear.
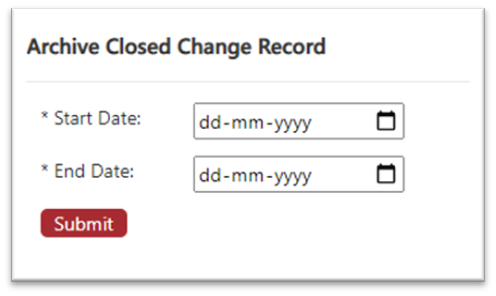
· Select the Start Date and End Date (range of date for which change needs to be archived).
· Click on the Submit Button.
· The user who initiated the job would receive an email notification with the number of records archived.
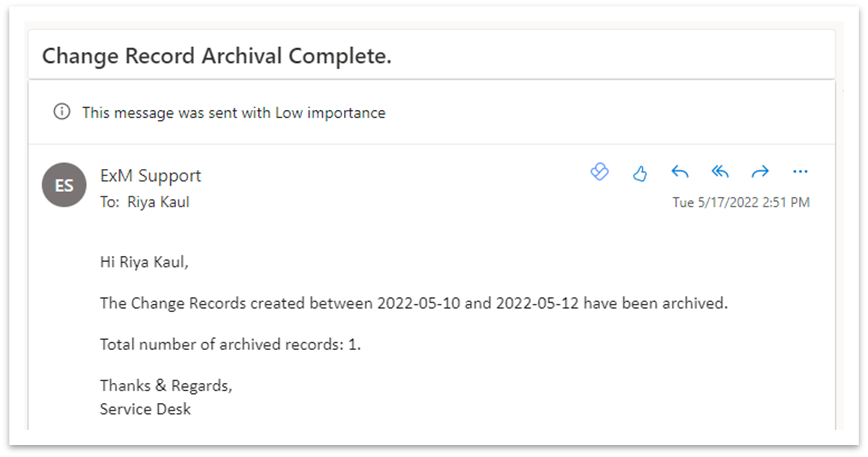
Note: It will only archive those change records which are in closed state.
Create Team Meeting
Create a meeting with all the users in the Informed list. The user can be added or deleted as per the requirement.
Click on “Create Team Meeting” button in top navigator.

A popup will appear.
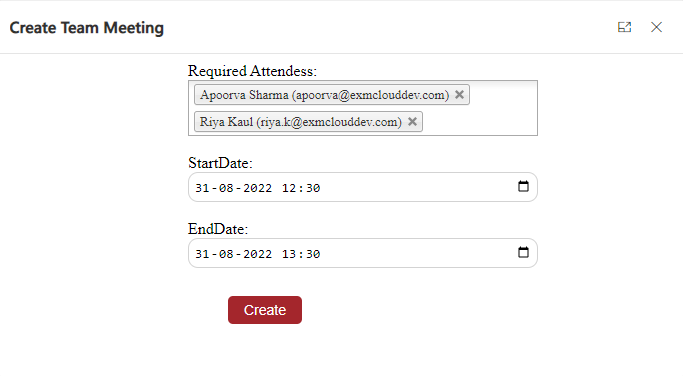
By default, it takes the Short Description as meeting title and for meeting message it takes value from Description.
By clicking on Create button, Teams meeting is created, and email is sent to all the concerned members.
Visibility: This custom button is only visible on the Assess and Authorize stage.
Assess Risk
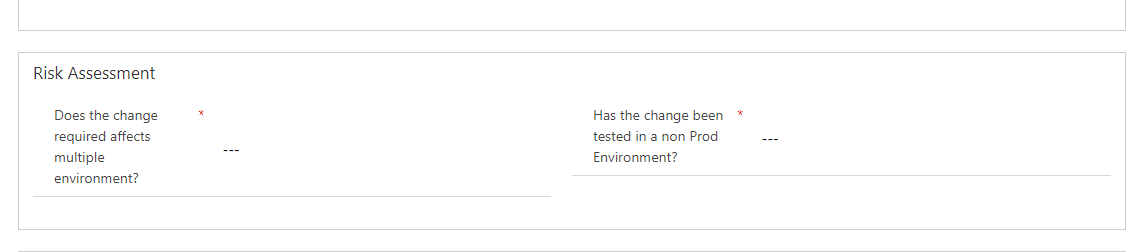
Risk is auto calculated based on the Risk Assessment section.
Risk Assessment section will be visible below the change details section.
Team Chat
Start a team chat with the selected users about the change request. Click on the ‘Team Chat’ button at the top navigation in the Change Request form.

The current logged in user is auto populated in the dropdown. Select the other users to be added to the team chat.
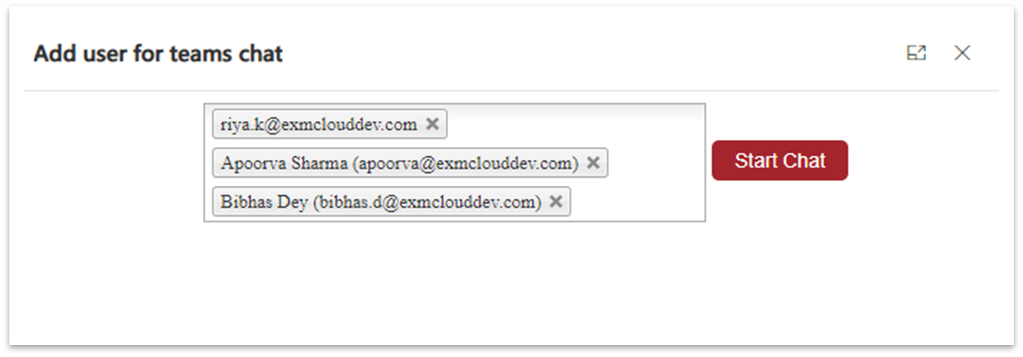
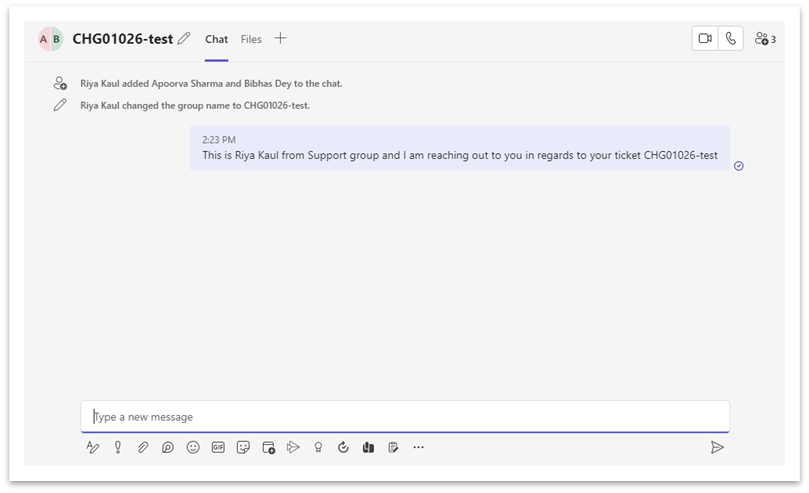
Click on ‘Start Chat’. You will be redirected to Open Microsoft Teams. The Team Chat is created.
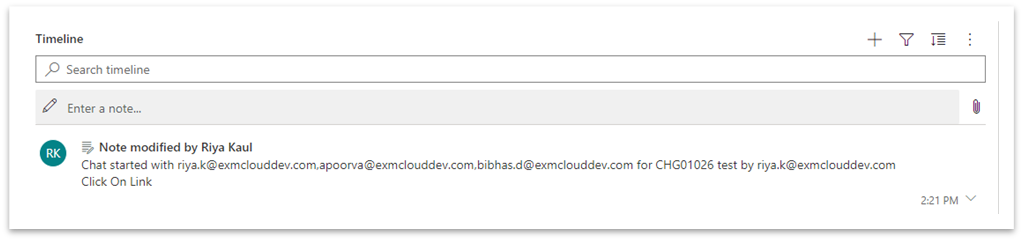
The same is notified in the Timeline section of the Change Request form with the link to the chat.
Related Configuration Item
On change creation, the user needs to select the CI related to that change.
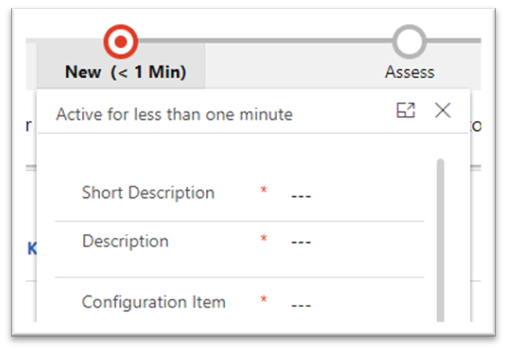
On selecting the CI, their details will be displayed.
Admin can view the Change Requests linked to the CI by navigation to CMDB -> Configuration Items from the left navigator.
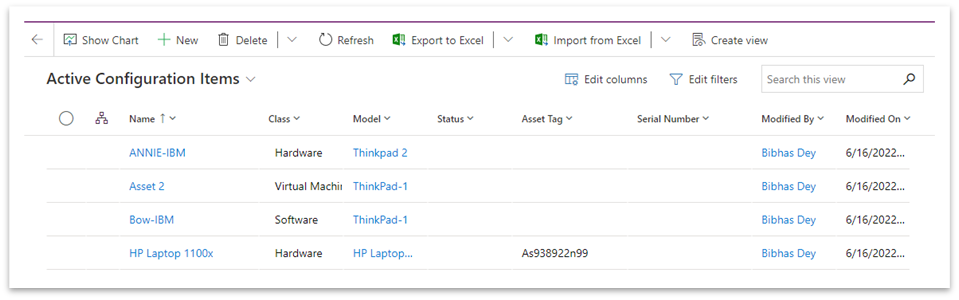
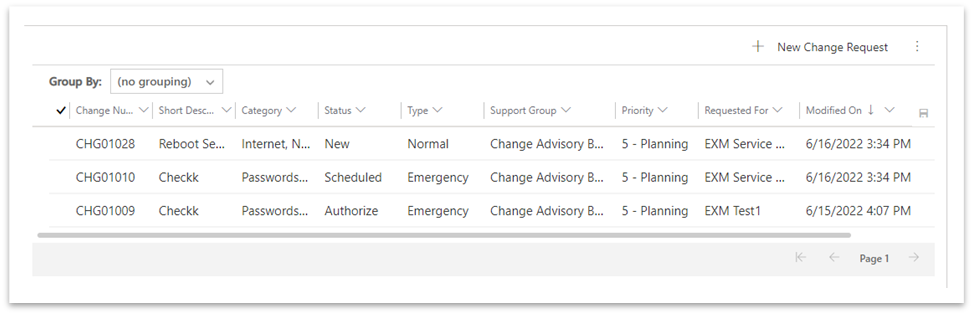
Open the CI and navigate to the Related Change section under the general tab.
Change Schedules
View the schedules in the Production, Development and Testing Environment.
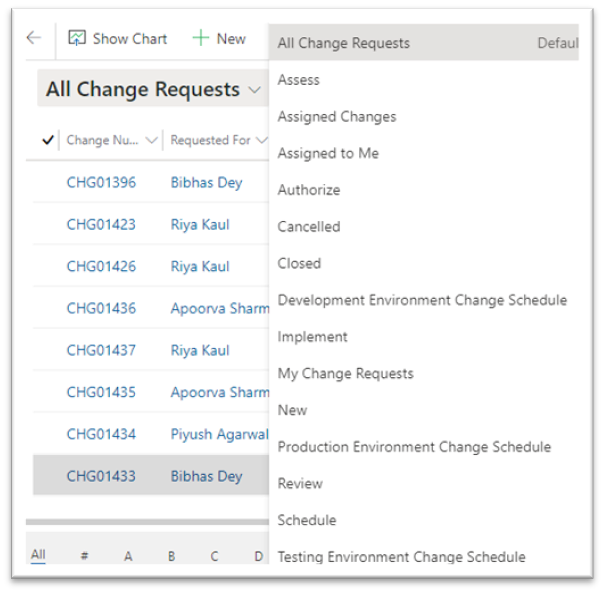
Navigate to *_Change Management > All Change Requests *_in the left navigator.
Click on the view dropdown at the top of screen. On selection, the following 3 views will display the changes in the Development, Production and Testing Environment:
Development Environment Change Schedule
Production Environment Change Schedule
Testing Environment Change Schedule
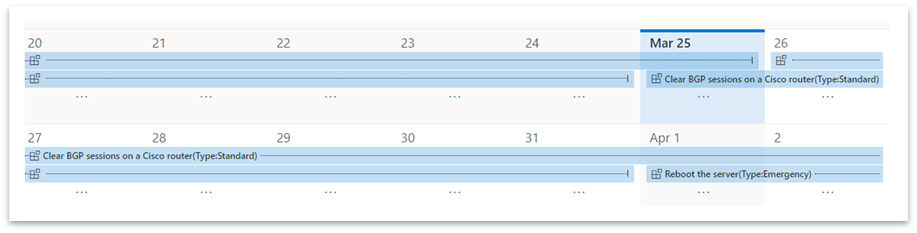
To display the schedule in a calendar view, navigate to Show As -> Calendar Control V2 from the top navigator.
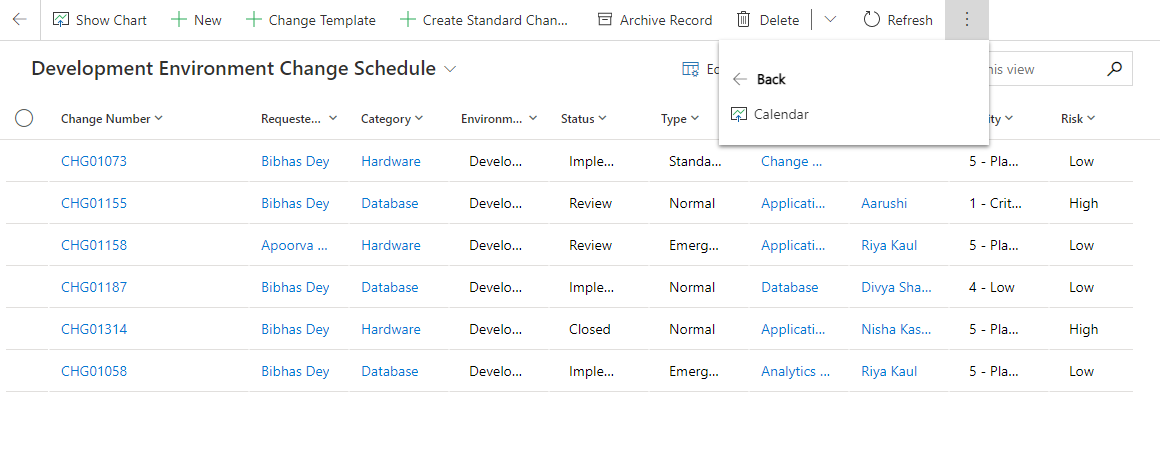
The change records will be visible in the calendar view.
Associated Stories And Releases with Change
Release
User can associate change with release while creating a change.
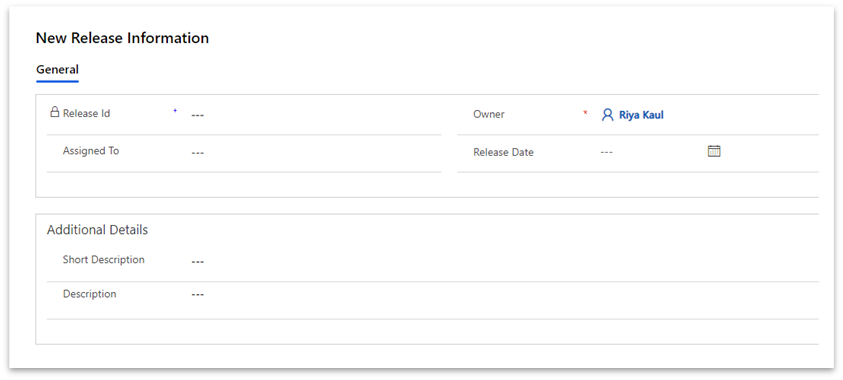
To create a release, navigate to All Releases section under the Release Management from left navigator.
Click on the  button to create a release. A form will open. Fill up the necessary details and save the form.
Fields | Description |
|---|---|
Release ID | Unique auto-generated number. |
Assigned To | User who works on the release. |
Release Date | Indicates the date of release. |
Short Description | Brief description of the release. |
Description | Detailed explanation of the release. |
Stories
To associate change to a story, navigate to the Stories section under the Agile section from left navigator.
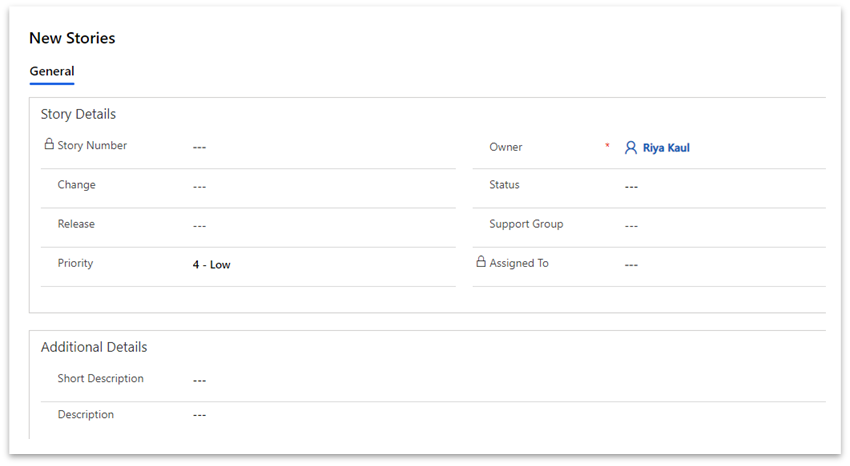
Click on the button to create a story. A form will open. Fill up the necessary details and save the form.
Fields | Description |
|---|---|
Story Number | Unique auto-generated story number. |
Change | Associate the change with the story. |
Priority | Priority indicates how quickly the stakeholders/fulfiller should address the story. |
Support Group | Group who will work on the story. |
Assigned To | User who works on the story. |
Status | States of story. |
Release | Indicates release activities related to the story. |
Short Description | Brief description of the story. |
Description | Detailed explanation of the story. |
Create Knowledge Articles from Change
Knowledge Article can be created from a Change record for which the closed codes are marked as successful. Navigate to a Change record and click on the "Create Knowledge" button from the top ribbon.