Create Work Order
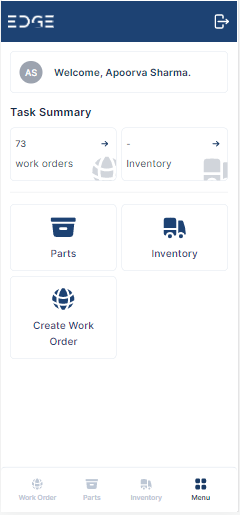
After signing in successfully, click on Create Work Order tile.
The form shown below will appear on the screen, allowing the user to create a work order.
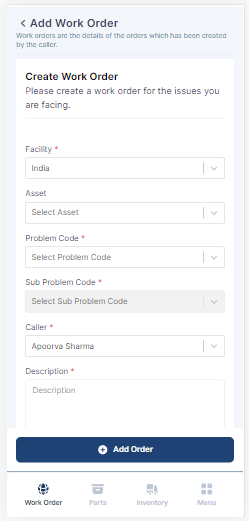
The user must complete the following fields on the form:
| Field | Description |
|---|---|
| Asset | Parts required to execute the work order. |
| Caller | Person reporting the Work Order |
| Description | Detailed explanation of the Work Order |
| Facility | Location of the current user. |
| Problem Code | Type of issue. |
| Sub Problem Code | On Selecting Problem Code, select the Sub Problem Code, if applicable. |
| Upload Document | Add files related to the Work Order |
The Facility, Problem code, Sub Problem Code, Caller and Description fields are mandatory however the user can upload document, or image file while creating the Work Order.
After the Create Work Order form is filled, click on the “Add Order” button.
View Work Orders
On successful submission, user will be redirected to the Work Order view or click on Work Orders tile to view all the created work orders.

All Work Orders
The list view will open and users can view the details for each work order.
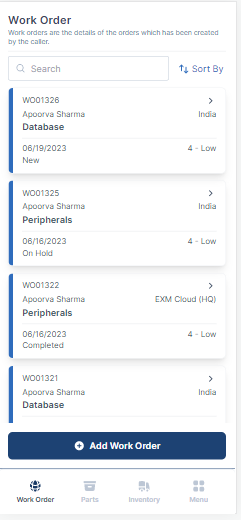
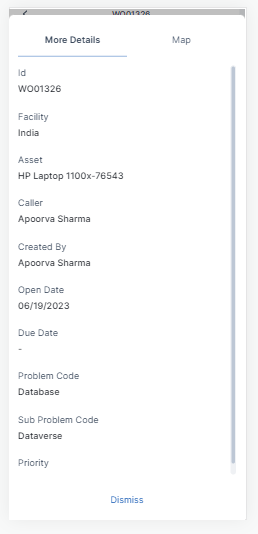
Work Order Details
Clicking on the most recent work order will bring the user to a screen where they can view all of the work order's data.

More Details
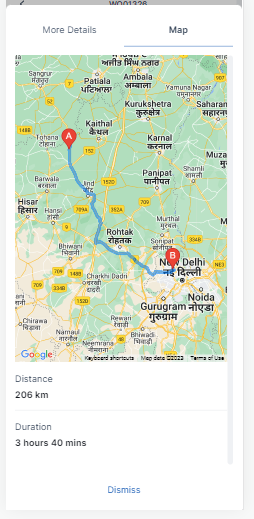
To view the map, click on  button.
View Map
It gives the distance between the Work Order Facility and the current user location.
To view the map, click on  button.
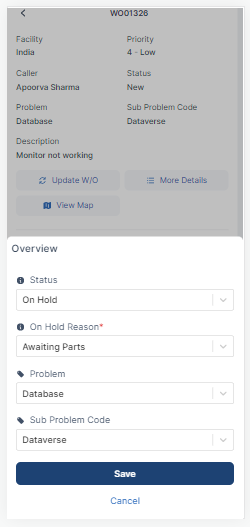
Edit Work Orders
The assigned agent/technician can edit the work orders.
Update Work Order
To edit the basic information of the work order, click on  button.
Facility, Priority, Caller
Status, Problem Code, Sub Problem Code
Agent can edit the status of work orders accordingly. If the work is in process, status can be updated to In Progress. If the work is paused, status can be updated to On Hold and On Hold reason is mandatory. If the task is complete, status can be updated to Completed and Resolution Notes are mandatory.
Click on  button to update the additional work order details.
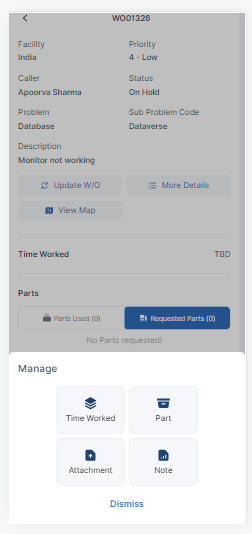
Manage Time Worked
Agent can also add the amount of time they have worked on the specific work order towards its completion into Time Worked field. Click on  button to add/update the time spent on the work order.
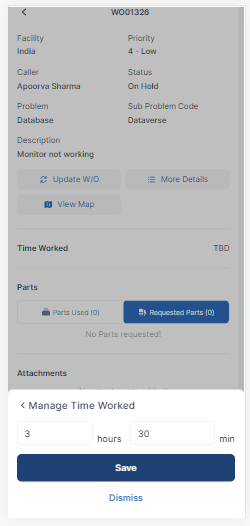
Click on Save and the updated time worked will be added.
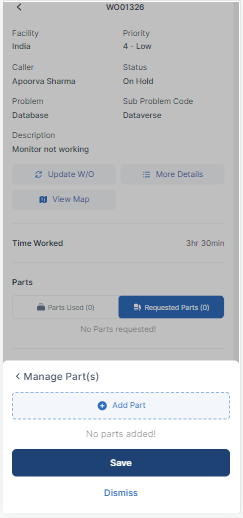
Manage Parts
The role of parts used in a work order is to facilitate the completion of service tasks by providing the necessary components or materials required for repairs, installations, or maintenance. All the parts utilized in a work order to make it complete can be added or removed from this section.
To add/remove parts, click on  button.
The required parts can be added by clicking on  button.
Parts can either be added from My Stockroom or from Any Stockroom. My Stockroom has all the parts listed from the field agent's truck who is working on this work order. If the parts are not available in the field truck, they can be transferred and used from any other stockroom which can also be a warehouse.
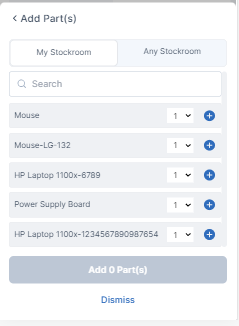
To add the parts, select the quantity required to fulfill the work order and click on Add Parts.
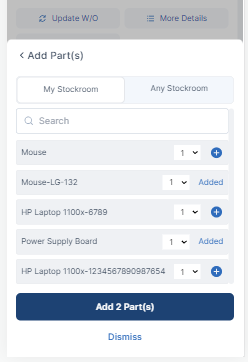
The selected parts and the cost associated with them will be shown in the Manage Parts section which can further be edited/removed.
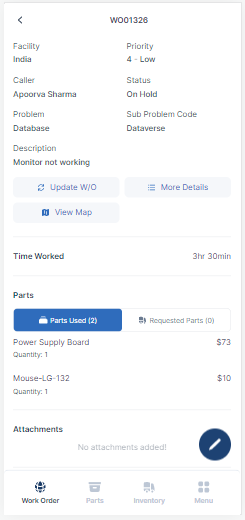
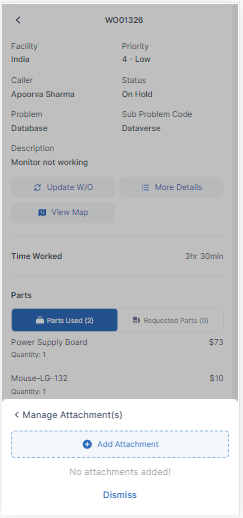
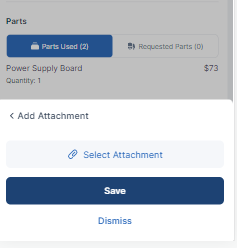
Manage Attachments
In the Attachments section, the user can upload documents or images to provide further information about the work order.
Click on  button to manage attachments.
Click on Select Attachment to choose the file to upload and click on Save.
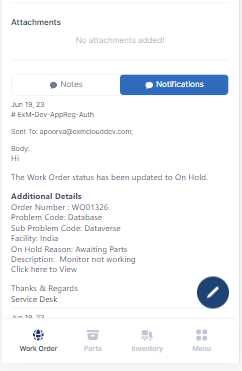
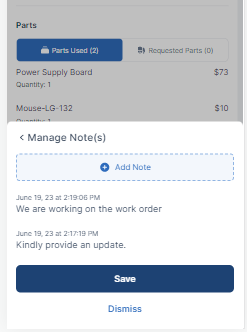
Manage Notes
The FSM system enables users to contact with the individuals in charge of completing the work order or to provide any additional information. The designated Notes section is where they can enter notes.
Click on  button to add new notes.
Agents can access all the emails that the system has sent out by visiting the Notification section of the Work Order.